
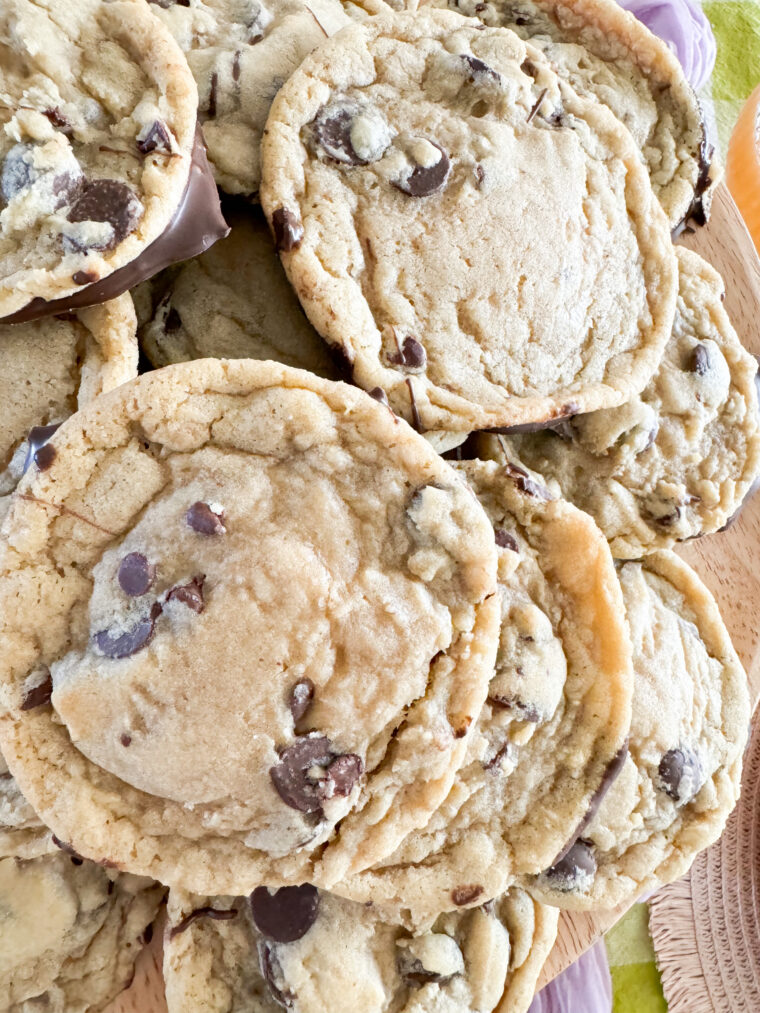
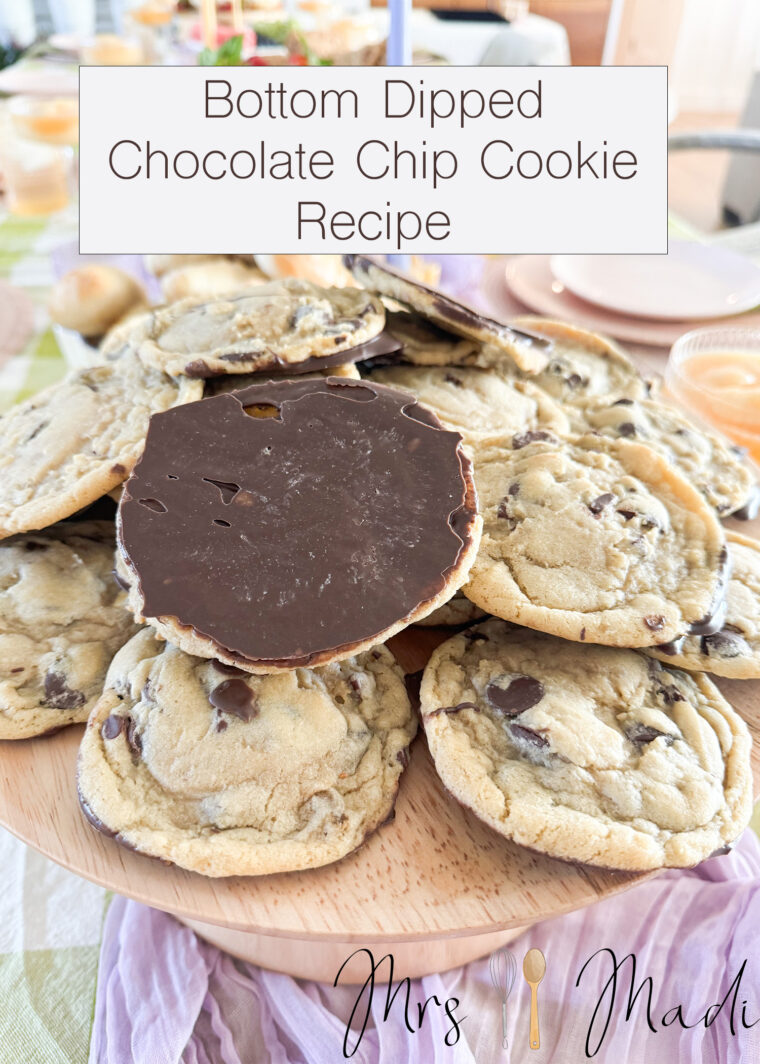
Indulge in these Bottom Dipped Chocolate Chip Cookies, where classic chewiness meets luxurious dark chocolate in an unforgettable culinary creation. These are one of my favorite cookies, they are not just baked to perfection with a crispy outer edge and gooey center, but also artistically dipped in rich dark chocolate, adding an elegant touch to a beloved treat.
I’ve always cherished the classic chocolate chip cookie recipe, but I wanted to elevate it into something spectacular. Adding a dip of dark chocolate to the bottom introduces a decadent contrast that makes these cookies a sophisticated option for any gathering or a special treat for yourself. It’s a simple twist that transforms the ordinary into the extraordinary, making each bite a delightful surprise.
I love an easy cookie recipe! Drop cookies are one of my go-to’s because no cookie cutter is needed. It’s hard to say that these are my favorite chocolate chip cookies because I actually have so many chocolate chip cookie recipes, and each has its place in my heart. They all bring something to the table that I love! If you love chocolate chip cookies you have got to check out my The Chemistry of Chocolate Chip Cookies ebook that goes into each ingredient & what chemistry is happening when you bake. And although I don’t know which are the best chocolate chip cookies, maybe you can decide for yourself with my Chocolate Chip Cookies that are thick and gooey, or my Best Bakery Style Chocolate Chip Cookie which are thin, crispy yet a little chewy. In fact this recipe is my thin bakery style cookie but then dipped in chocolate, so essentially double chocolate chip cookies.

The Chemistry of Bottom Dipped Chocolate Chip Cookies
The secret to achieving the perfect texture in these cookies lies in the combination of cake and bread flours. Cake flours gives the cookies a tender crumb, while bread flour provides enough gluten to keep them chewy. The use of both baking soda and baking powder ensures a slight rise and spread, achieving that ideal crispy edge. The melting of dark chocolate involves carefully managing temperature to avoid scorching, resulting in a smooth, glossy finish that solidifies as it cools, adhering beautifully to the cookies.
Why use both cake and bread flours in the cookie dough?
Using both types of flour balances softness and chewiness, ensuring the cookies have the perfect texture. It gives a texture that all-purpose flour cannot achieve. These flours yield chewy chocolate chip cookies with a slightly crispy outside.
How do I prevent the chocolate from seizing when melting?
Heat the chocolate in short bursts in the microwave, stirring in between, to ensure even heating without burning.
Can I freeze these chocolate-dipped cookies?
Yes, you can freeze them once the chocolate has fully set. Store them in an airtight container with parchment paper between layers to prevent sticking.
What’s the best way to dip the cookies without making a mess?
Use a small bowl for the melted chocolate and dip only the bottom part of each cookie, letting any excess chocolate drip off before placing it on parchment paper to set.
What is in bottom dipped chocolate chip cookies?
Cake Flour
Has a lower amount of protein and is very fine. It gives your treat a specific flavor and makes them very white or light in color. It’s made of soft wheat so it should not be used in place of all-purpose or bread flour. Only use when your recipe specifically calls for it.
Bread Flour
Is higher in protein and creates thicker treats. This is best used for bread and shouldn’t be used as a substitution for all-purpose or cake flour.
Baking Soda
Elevates the pH level of your batter or dough. It increases the spread in your treat and encourages browning, which gives the crispy outside and soft inside texture that everyone loves. Baking soda needs both an acid and a liquid to react. Things that will activate your baking soda are: vinegar, fruit juice, molasses, brown sugar, tartar, buttermilk and sour cream. Baking soda only reacts once, which is right when it’s mixed into your batter or dough. The soda creates little air bubbles all throughout your treat. When the air bubbles get heated up in the oven, they expand.
Baking Powder
Puffs up your batter or dough instead of spreading it out. Baking powder contains a little bit of baking soda, an acid & cornstarch. Because of this, it only needs a liquid to react. It also consists of two different acids, so it’s double reacting. It reacts as soon as it’s mixed with a moisture and then again when it’s heated up.
Fine Sea Salt
Enhances flavor, adds balance, masks any bitter flavors. Salt is the most powerful and oldest preservative. Always make sure to use fine sea salt so it melts down at the right speed in the heat of the oven. If you use larger granule salt, it will not melt down fully when baked and will leave salt crystals throughout your treat, making it crunch like you dropped it into sand. All of my favorite salts are from Redmond and I have a discount code for you to get 15% off.
Brown Sugar
Is granulated sugar with a little molasses mixed in. Molasses is a somewhat smoky flavored natural sweetener, which makes brown sugar a bit sweeter than granulated sugar. Brown sugar draws more moisture into your treat, keeping it softer for longer. It’s also more acidic, which means it will help activate your baking soda.
Granulated Sugar
Adds sweetness, provides a caramelized flavor and crisp texture. Sugar assists with rising when creamed with butter. It helps add moisture to your treat and helps it evenly spread as it melts into a liquid in the heat of the oven. Sugar also helps with naturally preserving your baked treat.
Unsalted Butter
It is always important to use unsalted butter when baking. If you use salted butter, you have no way of knowing how much salt you are adding to your dough or batter and it will result in an overly salted treat.
Butter adds fats to your dough or batter which helps with moistness, flavor and texture. Butter melts at body temperature, which creates a ‘melt in your mouth’ sensation.
When baking with butter, the temperature is important. If the butter is too warm, your treat will melt too fast and overspread in the oven, leaving you with a greasy, flat mess. If your butter is too cold, it will have the opposite problem and not melt down enough, leaving your treat too thick.
Eggs
Adds both a protein (egg whites) and fat (egg yolks). The egg whites help with rising because, when foamed, little air pockets get trapped inside the egg white mixture. The water content in egg whites encourages steam while baking, which helps with gluten formation, resulting in nice and thick treats. Egg yolks have emulsifying properties that bring batters and doughs together and help them from collapsing. Unless otherwise specified, always use large eggs.
Vanilla Extract
When using pure vanilla extract, as opposed to imitation flavoring, it will add the deep rich flavor that everybody wants in a treat.
Chocolate Chips
Is a form of chocolate. Chocolate chips are not pure chocolate, they are typically made up of cocoa, sugar, emulsifier and vanilla. Chips are good for baking because they do not melt completely in the oven like pure chocolate would. That way you get confined pockets of chocolate throughout your treat.
Step by Step Instructions
Cookies
- Combine the flour, baking soda, baking powder, and salt in a medium-sized mixing bowl. Set aside.
- In a standing mixer with a paddle attachment add the butter and mix until softened.
- Add both brown sugar and white sugar and mix until combined. Once combined, turn the speed up on the mixer and whip for 1-2 minutes until it is lighter in color and texture to cream the butter. It is helpful to stop the mixer every 30 seconds and scrap the sides of the bowl.
- Add the eggs and vanilla, mix on low speed until combined.
- Turn the mixer on low and slowly pour the dry ingredients in. Mix until the dough comes together.
- Fold in the chocolate chips. For this recipe, I would only use bittersweet chocolate chips or dark or semi-sweet chocolate chips. Milk chocolate chips just don’t complement the dough the same way. This is coming from someone who prefers milk chocolate over dark chocolate in almost everything.
- Cover the dough with plastic wrap and refrigerate for 1-3 hours minimum. You can also leave it in the fridge for up to 3 days.
- Once the dough has chilled, preheat your oven to 350 degrees.
- Scoop the dough with a 2 tbsp cookie scoop onto a light metal, parchment paper-lined cookie sheet. The cookies end up the size of generous golf balls.
- Bake cookies for 11-12 minutes until the cookies are lightly golden brown.
- Remove the cookies from the oven and allow them to rest for 5-10 minutes before removing them from the pan.
- Allow the cookies to cool fully on a wire rack.
Dipping
- Once the cookies are cool, it’s time to melt chocolate. You can heat the remaining 2 cups of dark chocolate chips in a microwave-safe bowl. If you rather you can also use chopped up chocolate bars. Slowly melt them for 30 seconds at a time, stirring between each heat cycle. After about 1.5 minutes, the chocolate should be completely melted.
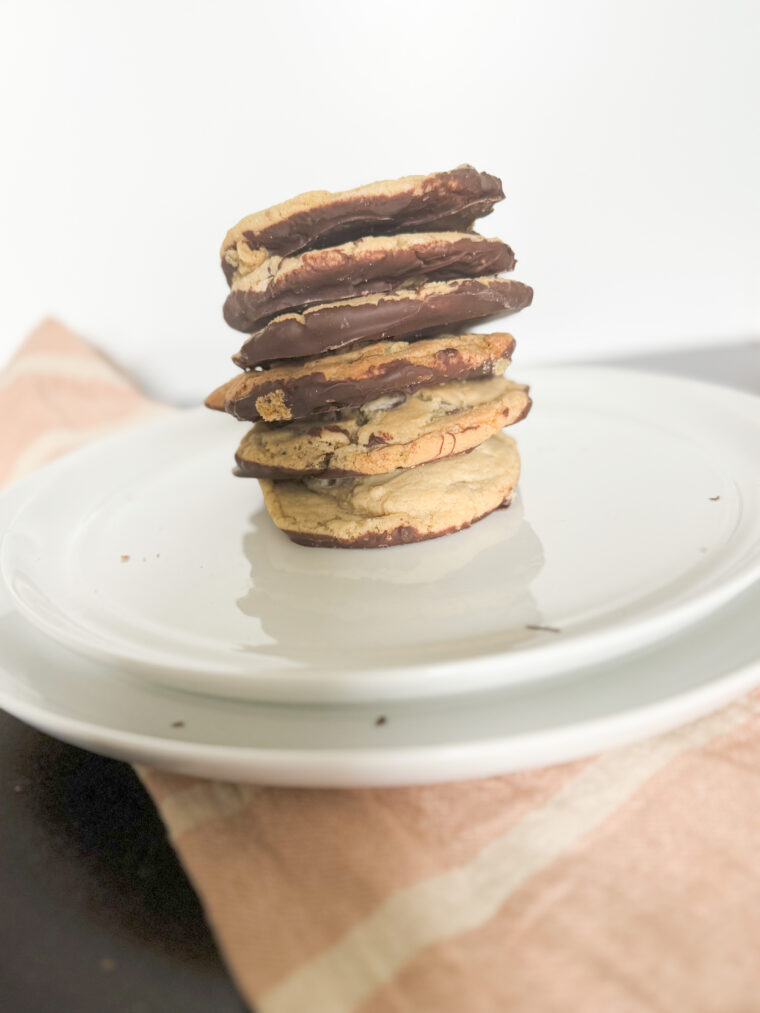
- Dip the bottom of the cookies into the bowl of chocolate and shake off the excess chocolate over the bowl.
- Place the cookie, dipped side down, on a piece of parchment or wax paper. Don’t worry—once the chocolate has fully hardened, it will easily peel off the parchment. If dipping the bottom seems tricky, you can dip half of the cookie in the chocolate.
- Let the cookies fully set. Enjoy!

Storage Tips
Store the cookies at room temperature in an airtight container for up to a week. Ensure they are completely cool and the chocolate has hardened before storing to maintain texture and prevent them from sticking together.
Freezing Options
Once the chocolate has set, you can freeze the cookies for up to 3 months. Place them in a single layer on a baking sheet to freeze individually, then transfer to airtight containers, separating layers with parchment paper.
Making Ahead
Prepare the dough in advance and refrigerate for up to 3 days, allowing the flavors to meld and deepen. This also makes the baking process more manageable, especially for events.
Recommended Products
Why make bottom dipped chocolate chip cookies?
These exquisite cookies, each with a shiny, rich dark chocolate base contrasting beautifully against the classic cookie top. Delight in the luxurious upgrade of dipping cookies in chocolate, perfect for sharing or gifting during the holiday season or special occasions.
Recipes You May Love

Bottom Dipped Chocolate Chip Cookies
Ingredients
- 1 1/2 cups cake flour
- 1 1/2 cups bread flour
- 1 tsp baking soda
- 1 tsp baking powder
- 1 tsp fine sea salt
- 1 1/4 cup brown sugar
- 1 cup granulated sugar
- 1 cup unsalted butter
- 2 eggs
- 2 tsp vanilla extract
- 12 ounces bitter sweet chocolate chips **one bag**
- 2 cups dark chocolate chips
Instructions
- In a medium sized mixing bowl combine both flours, baking soda, baking powder and salt. Set aside.
- In a standing mixer add the butter and mix until softened.
- Add both sugars and mix until combined. Once combined turn the speed up on the mixer and whip for 1-2 minutes until lighter in color and texture.
- Add the eggs and vanilla, mix on low until combined.
- Turn the mixer on low and slowly pour the dry ingredients in. Mix until the dough comes together.
- Fold in the chocolate chips.
- Cover the dough and refrigerate for 1-3 hours minimum. You can also leave in the fridge for up to 3 days.
- Once the dough has chilled, preheat your oven to 350 degrees.
- Scoop the dough onto light metal, parchment paper lined cookie sheets.
- Bake for 11-12 minutes until the cookies are lightly golden.
- Remove from the oven and allow the cookies to rest for 5-10 minutes before removing from the pan.
- Allow the cookies to fully cool
- Heat up the remaining 2 cups of dark chocolate chips the microwave using a microwave safe bowl. Slowly melt it by heating for 30 seconds at a time, stirring between each heat cycle. After about 1.5 minutes the chocolate should be completely melted.
- Dip the bottom of each cookie into the chocolate, shake off excess chocolate over the bowl.
- Place the cookie, dipped side down, on a piece of parchment paper. Don't worry, once the chocolate has fully hardened, it will easily peel right off of the parchment.
- Let the cookies fully set. Enjoy!
Nutrition
Have you tried this recipe?
I’d love to see it! Follow @_mrs.madi_ on Instagram and tag your photos with #mrsmadi.


Ava Grass
These are so good! Love that they are an elevated classic & felt really special!! The chocolate bottom gave an extra rich flavor that you don’t get from a normal chocolate chip cookie!
Madison Reid
So glad you approve! Thanks for taking the time to leave a comment.
Holli Reid
I could eat these all day! They are the perfect chewy goodness.
Madison Reid
Seriously, that sounds like a dream. Thanks for taking the time to comment.
Aurie
I love lots of chocolate in my cookies and this recipe was perfect! Great consistency too!
Madison Reid
Thank you for taking the time to leave a comment!
Jamie Robinson
Loved these. Can’t eat just one!!!!!
Madison Reid
Same! So good!!
Carli
These might be my new favorite chocolate chip cookies. I love the crunch and the chocolate on the bottom. I have had them with milk chocolate and dark and they are good either way! Although I’m more of a dark chocolate fan😊
Madison Reid
Oh, thank you so much!!
Alexa Holland
I love that you get the perfect amount of chocolate in every bite. And the cookie is so soft!
Madison Reid
Thank you for taking the time to leave a review!