
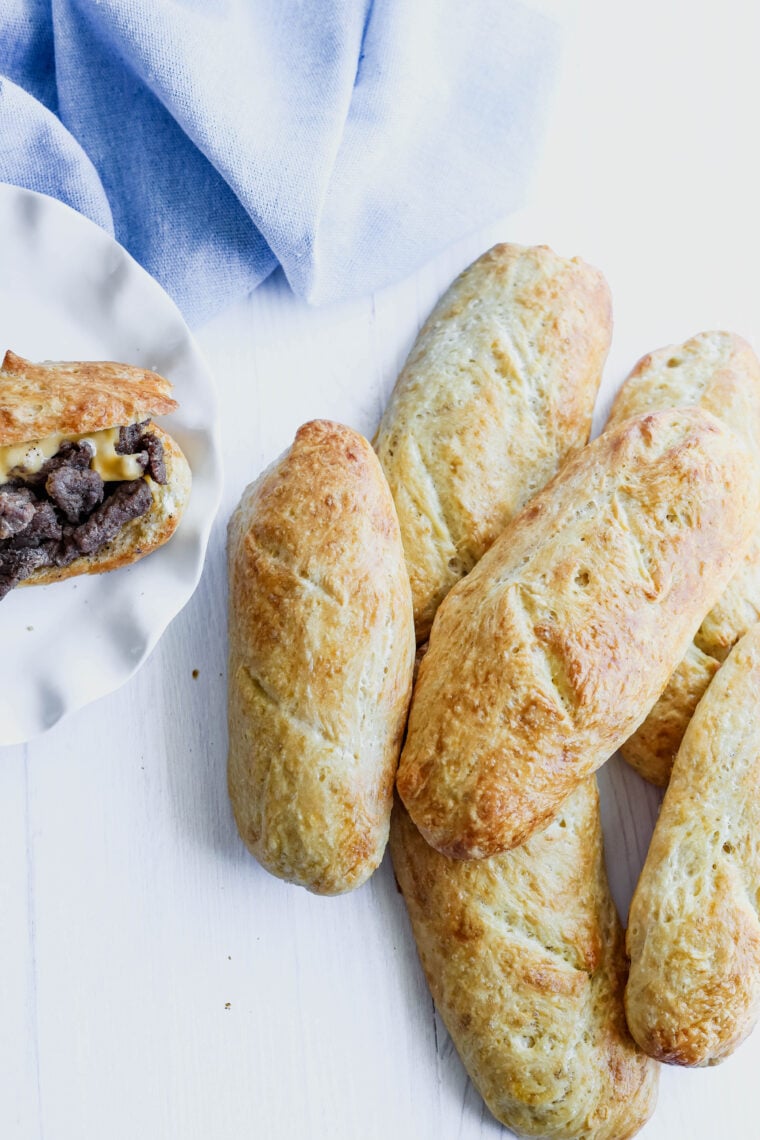
These homemade hoagie buns are the ultimate foundation for your favorite sandwiches- from meatball subs and Philly cheesecakes to classic deli combos. They’re soft yet sturdy, with a golden brown crust and tender interior that makes every bite satisfying. Made with simple ingredients like all-purpose flour, instant yeast, and warm water, this hoagie roll recipe will elevate your sandwich game and leave store-bought buns in the dust. Whether you’re prepping for a tailgate party or just love homemade bread recipes, these rolls are a must-bake.
Think of these as your go-to homemade hoagie rolls, whether you’re making sub rolls, Philly hoagie buns, or Italian sandwich rolls. They’re perfect for even hot dog buns in a pinch. It’s an easy hoagie bun recipe that fits right in with your favorite homemade bread recipes.
The Chemistry of Homemade Hoagie Buns
The key to perfect hoagie buns is ll the gluten formation and moisture balance. Instant yeast jumpstarts the rise while warm water activates it quickly. Adding melted butter enriches the dough and gives it a soft, flavorful crumb. The kneading time develops elasticity, while the long rise time ensures airiness. Shaping the dough balls into logs and allowing them to rest in a draft-free place lets the yeast work its magic. Brushing the tops with olive oil or butter post-bake locks in moisture and adds a hint of sheen.

Recipe Troubleshooting
If your dough doesn’t rise properly, the culprit is often expired yeast or liquid that’s too hot. Yeast only lasts about 3-6 months once opened, so be sure to replace it 2-4 times a year. Also, hot water will instantly kill the yeast, so it’s better to add water on the cold side.
For flat buns, check your shaping technique- rolling with even pressure and tucking the seam side under helps.
If you end up with buns that are too dense, it usually comes from adding too much flour or skipping the kneading step.
If your buns spread too wide, use a large baking sheet and ensure they’re spaced far enough apart so that they do not touch.
A hard crust? Probably due to over-baking or a lack of steam, try using a second oven-safe pan filled with ice cubes to add humidity on the shelf below the bread.
How do I get that golden brown crust? Brush with an egg wash or melted butter before baking.
How do I shape them evenly? Use a kitchen scale to divide the dough into equal portions.
Why are my buns bland? Don’t skip the salt, and consider brushing the tops with olive oil after baking.
Can I use bread flour? Absolutely- it improves gluten formation and adds chew.
They stuck to the pan– Always line with parchment paper or lightly grease.
My buns split at the bottom – seal the seam tightly and place seam-side down before rising.

Serving Suggestions
These buns shine for summer sandwich recipes, 4th of July cookouts, and tailgate party sandwiches. Think of BBQ sandwich buns and game day food ideas. Serve them as part of your picnic sandwich bread spread—homemade buns for grilling season and meal prep sandwich kits.
Use these buns for classic hoagie sandwiches- think roast beef, turkey, cheesesteak, or Italian subs. Warm slightly, slice, and fill with cheese, lettuce, and deli meat. Or try toasting for meatball subs and cheesesteaks. Brush with butter for a shiny finish, serve alongside crispy fries and pickles, or arrange on a wooden board with dips and spreads. For parties, slice into thirds for mini sandwiches or stack on a platter with toothpicks for grab-and-go ease.
Slice the sub rolls, toast them for meatball subs, or pile them high with lunch meat for hearty sandwiches. They’re great with honey mustard, Worcestershire sauce, or even brushed with garlic butter. These rolls shine on any table- weeknight dinners, party trays, or your next picnic.

Storage Tips
Store in an airtight container at room temperature for up to 3 days. To refresh, wrap in foil and warm in the oven for 5-10 minutes at 300°F.
Freezer– After baking and cooling, store in a freezer-safe container or bag for up to 3 months—reheat wrapped in aluminum foil at 325°F for 15 minutes. You can also freeze shaped, unbaked buns wrapped up in foil and then bake at a later date.
Make Ahead– You can prepare the dough the night before and store it in the fridge after the first rise. The next day, shape, let rise again at room temperature 1-2 hours, then bake.
Perfect Homemade Sub Rolls
Whether you’re hosting a game day feast or prepping sub rolls for a week, these homemade hoagie buns are soft, flavorful, and incredibly satisfying. With a chewy crumb, tender crust, and just the right rise, they’re the best hoagie bun solution for any sandwich. Try them once, and you’ll never go back to the grocery store buns again. They’re a true sandwich game changer.


Easy Hoagie Rolls from Scratch
Ingredients
- 4 cups all-purpose flour
- 1 1/2 cup warm water
- 2 tbsp granulated sugar
- 1 tbsp instant yeast
- 1 tsp fine sea salt
- 4 tbsp melted butter
Instructions
- In a standing mixer with the dough hook attachment, add 1 1/2 cups warm water, two tablespoons granulated sugar, and one tablespoon yeast. Mix to combine.
- Turn the mixer on slow and add 4 cups of all-purpose flour and 1 tsp fine sea salt. Mix until a shaggy dough forms.
- Add 4 tbsp melted butter and turn the mixer on low to knead for a few minutes.
- Remove the mixing bowl, cover with a clean kitchen towel and place in a warm spot for 2-3 hours until it doubles in size.
- Remove the dough onto a lightly floured surface. Knead and roll the dough out, cutting it into 8 equal parts.
- Roll each piece into a long snake shape.
- Place the dough pieces on two light-metal colored pans lined with parchment paper and cover with plastic wrap. Allow them to rise for a second time for 45-60 minutes.
- Preheat the oven to 375 degrees F.
- Uncover the buns and place them into the oven. Bake for 22 minutes.
- Remove and allow them to cool for a few minutes on the pan before removing and placing on a wire rack to finish cooling.
Nutrition
Have you tried this recipe?
I’d love to see it! Follow @_mrs.madi_ on Instagram and tag your photos with #mrsmadi.


