
If you’re searching for the best crispy chocolate chip cookies, look no further! These crunchy chocolate chip cookies are packed with dark chocolate chips, have crispy edges, and deliver that perfect chocolate chip cookie crunch in every bite. With just the right ratio of ingredients, a baking time that ensures golden brown finish, and a few secret techniques, these truly crispy chocolate chip cookies will become your go-to recipe for every occasion.

The Chemistry Behind Crispy Chocolate Chip Cookies
Getting the perfect crispy chocolate chip cookie requires the right balance of dry ingredients and moisture control. Using a higher white sugar to brown sugar ratio helps create a crisp cookie rather than a chewy texture. Baking at a slightly higher baking time and allowing the cookies to fully set on the hot pan before transferring to a wire rack also helps develop that crunchy texture. Additionally, using a prepared baking sheet lined with parchment paper prevents excess moisture from making the cookies too soft.
- Ingredient Ratio– The best way to get crunchy cookies is to use a higher ratio of granulated sugar to brown sugar. White sugar promotes crispiness, while light brown sugar creates a balance between crisp and chewy.
- Flour Choice– All-purpose flour works best for an even crunch. But substituting out some for cake flour would result in a more delicate crunch.
- Room Temperature Butter– Softened butter allows for better incorporation with the dry ingredients, while melted butter can cause the cookies to spread too much.
- Baking Temperature – Baking at a slightly higher temperature for a bit longer will help achieve that crunchy texture. Baking time varies, but around 12 minutes at 350 degrees F is ideal for a thin cookie with crisp edges.
- Fully Cooling the Cookies– Allowing the cookies to fully cool before transferring to a container will help not trap in moisture and keep the cookies crunchy.

Ingredients for Crispy Chocolate Chip Cookies
All-purpose Flour
Builds structure as it absorbs liquids and expands. All-purpose flour falls in the middle of bread flour (high in gluten) and cake flour (low in gluten). It’s exactly what it is named, all-purpose, the most universal flour that can be used in most baked goods.
Baking Soda
Elevates the pH level of your batter or dough. It increases the spread in your treat and encourages browning, which gives the crispy outside and soft inside texture that everyone loves. Baking soda needs both an acid and a liquid to react. Things that will activate your baking soda are: vinegar, fruit juice, molasses, brown sugar, tartar, buttermilk and sour cream. Baking soda only reacts once, which is right when it’s mixed into your batter or dough. The soda creates little air bubbles all throughout your treat. When the air bubbles get heated up in the oven, they expand.
Fine Sea Salt
Enhances flavor, adds balance, masks any bitter flavors. Salt is the most powerful and oldest preservative. Always make sure to use fine sea salt so it melts down at the right speed in the heat of the oven. If you use larger granule salt, it will not melt down fully when baked and will leave salt crystals throughout your treat, making it crunch like you dropped it into sand. All of my favorite salts are from Redmond and I have a discount code for you to get 15% off.
Unsalted Butter
It is always important to use unsalted butter when baking. If you use salted butter, you have no way of knowing how much salt you are adding to your dough or batter and it will result in an overly salted treat.
Butter adds fats to your dough or batter which helps with moistness, flavor and texture. Butter melts at body temperature, which creates a ‘melt in your mouth’ sensation.
When baking with butter, the temperature is important. If the butter is too warm, your treat will melt too fast and overspread in the oven, leaving you with a greasy, flat mess. If your butter is too cold, it will have the opposite problem and not melt down enough, leaving your treat too thick.
Granulated Sugar
Adds sweetness, provides a caramelized flavor and crisp texture. Sugar assists with rising when creamed with butter. It helps add moisture to your treat and helps it evenly spread as it melts into a liquid in the heat of the oven. Sugar also helps with naturally preserving your baked treat.
Brown Sugar
Is granulated sugar with a little molasses mixed in. Molasses is a somewhat smoky flavored natural sweetener, which makes brown sugar a bit sweeter than granulated sugar. Brown sugar draws more moisture into your treat, keeping it softer for longer. It’s also more acidic, which means it will help activate your baking soda.
Egg Yolks
Adding extra egg yolks to your batter will add extra richness and chewiness to your cookie or brownie.
Milk
Adds moisture to the batter or dough. Milk adds protein and sugar (lactose) to your treat. It encourages browning and adds a bit more sweetness to your baked treat.
Vanilla Extract
When using pure vanilla extract, as opposed to imitation flavoring, it will add the deep rich flavor that everybody wants in a treat.
Chocolate Chips
Is a form of chocolate. Chocolate chips are not pure chocolate, they are typically made up of cocoa, sugar, emulsifier and vanilla. Chips are good for baking because they do not melt completely in the oven like pure chocolate would. That way you get confined pockets of chocolate throughout your treat.

Achieving that Crunchy Cookie Texture
One of the most common issues is cookies turning out too soft or chewy instead of crispy. This happens when too much brown sugar or corn syrup is used, or if the cookie dough balls are too thick. This recipe calls for even brown and granulated sugar which helps achieve that crisp texture and no corn syrup, which would definitely soften the cookie like all inverted sugar does (which is great to use when you want extra chewy and soft cookies).
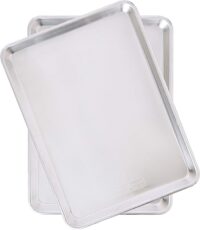
If you experience the edges burning before the center is fully baked, this is often because of dark baking sheets, which absorb too much heat, or an uneven oven temperature. Using light-colored baking trays ensures even baking. If you suspect that your oven temperature is off, buy an oven thermometer to double check.
If your cookies turn out too hard and not crunchy, this is probably because they were overbaked or there was too little butter or sugar in the dough. Measure correctly because the balance of wet and dry ingredients is essential.
Avoiding Overspread Cookies
If your cookies are spreading too much and becoming thin and brittle. This can happen if you use too soft or even melted butter. You need to use room temperature butter so that it doesn’t melt down too quickly in the oven. Another reason why this might happen is if you are not using enough flour. Make sure to measure accurately, using a kitchen scale is best. If the cookies are still spreading out too much, your house might be too warm! Try chilling the dough before baking to help control the spread.

Serving Suggestions
- Classic Paring– Serve with a cold glass of milk for the ultimate nostalgic treat.
- Gourmet Twist– Dip half the cookie in dark chocolate and sprinkle with flaky sea salt.
- Dessert Idea– Use them as a base for ice cream sandwiches with vanilla or caramel ice cream.
- Gift Box Addition– Package in a tin with parchment paper to maintain crispiness for gifting.
- Decadent Paring– Enjoy with a cup of drinking chocolate for the ultimate chocolate duo.
Storage Tips
To make sure that your cookies stay crispy after cooling, make sure that you are letting the cookies fully cool before transferring them to an airtight container. Storing them in an airtight container too soon can trap in moisture. Letting the cookies cool completely on a wire rack before storing is key.
Storing the cookies in a cookie tin lined with parchment paper instead of a plastic container can help maintain crispiness.
Freezing– These crispy chocolate chip cookies freeze well. Store baked cookies in an airtight container, or freeze cookie dough balls and bake fresh when needed. Bake directly from the freezer, adding a couple of extra minutes to the bake time.
Making Ahead– To prepare ahead, mix the cookie dough and store it in the fridge for up to 3 days or freeze it for up to 3 months. For best results, bake straight from the refrigerator or freezer, adding an extra minute to the bake time.
Recommended Products

Crunchy Chocolate Chip Cookies
This crunchy chocolate chip cookie recipe is a game-changer for anyone who loves crisp cookies with buttery edges. The perfect balance of semi-sweet chocolate chips, the right amount of flour and a golden brown finish makes these thin and crispy chocolate chip cookies absolutely irresistible.
Whether you’re making them for a holiday crispy cookie gift box, a batch of ice cream sandwich cookies, or just because you love homemade cookies, this recipe will give you perfect results every time.


Golden Brown & Crunchy Chocolate Chip Cookies
Ingredients
- 2 cups all-purpose flour
- 1 tsp baking soda
- 1 tsp fine sea salt
- 3/4 cup unsalted butter
- 3/4 cup granulated sugar
- 3/4 cup brown sugar
- 2 egg yolks
- 2 tbsp milk
- 1 tsp vanilla extract
- 1 bag dark chocolate chips
Instructions
- Preheat your oven to 350 degrees
- In a standing mixer with the paddle attachment, add 3/4 cup unsalted butter, 3/4 cup granulated sugar and 3/4 cup brown sugar. Mix to combine. Once combined, turn the mixer up to medium-high speed and beat for 2 minutes until lighter in color and fluffier in texture.
- Fold in 2 egg yolks, 2 tbsp milk, and 1 tsp vanilla extract.
- Add the dry ingredients: 2 cups all-purpose flour, 1 tsp baking soda, and 1 tsp fine sea salt. Mix on low until a dough forms.
- Fold in the bag of dark chocolate chips.
- Line light-metal colored cookie sheets with parchment paper and scoop the dough out using a standard cookie scoop, leaving 2 inches of space between.
- Bake for 12 minutes.
- Remove and let the cookies rest for 5 minutes before removing from the pan.
- Once cooled off, enjoy!
Nutrition
Have you tried this recipe?
I’d love to see it! Follow @_mrs.madi_ on Instagram and tag your photos with #mrsmadi.


Jayden
These remind me of a bakery 100%! So good!
Madison Reid
Me too! I love a good bakery-style cookie at home!